To create a new project, click '+ Create Project', at the top right of the Project Dashboard.

Fill in the appropriate details based on your project. Any fields marked with an asterisk* are required, while those without the asterisk are optional.
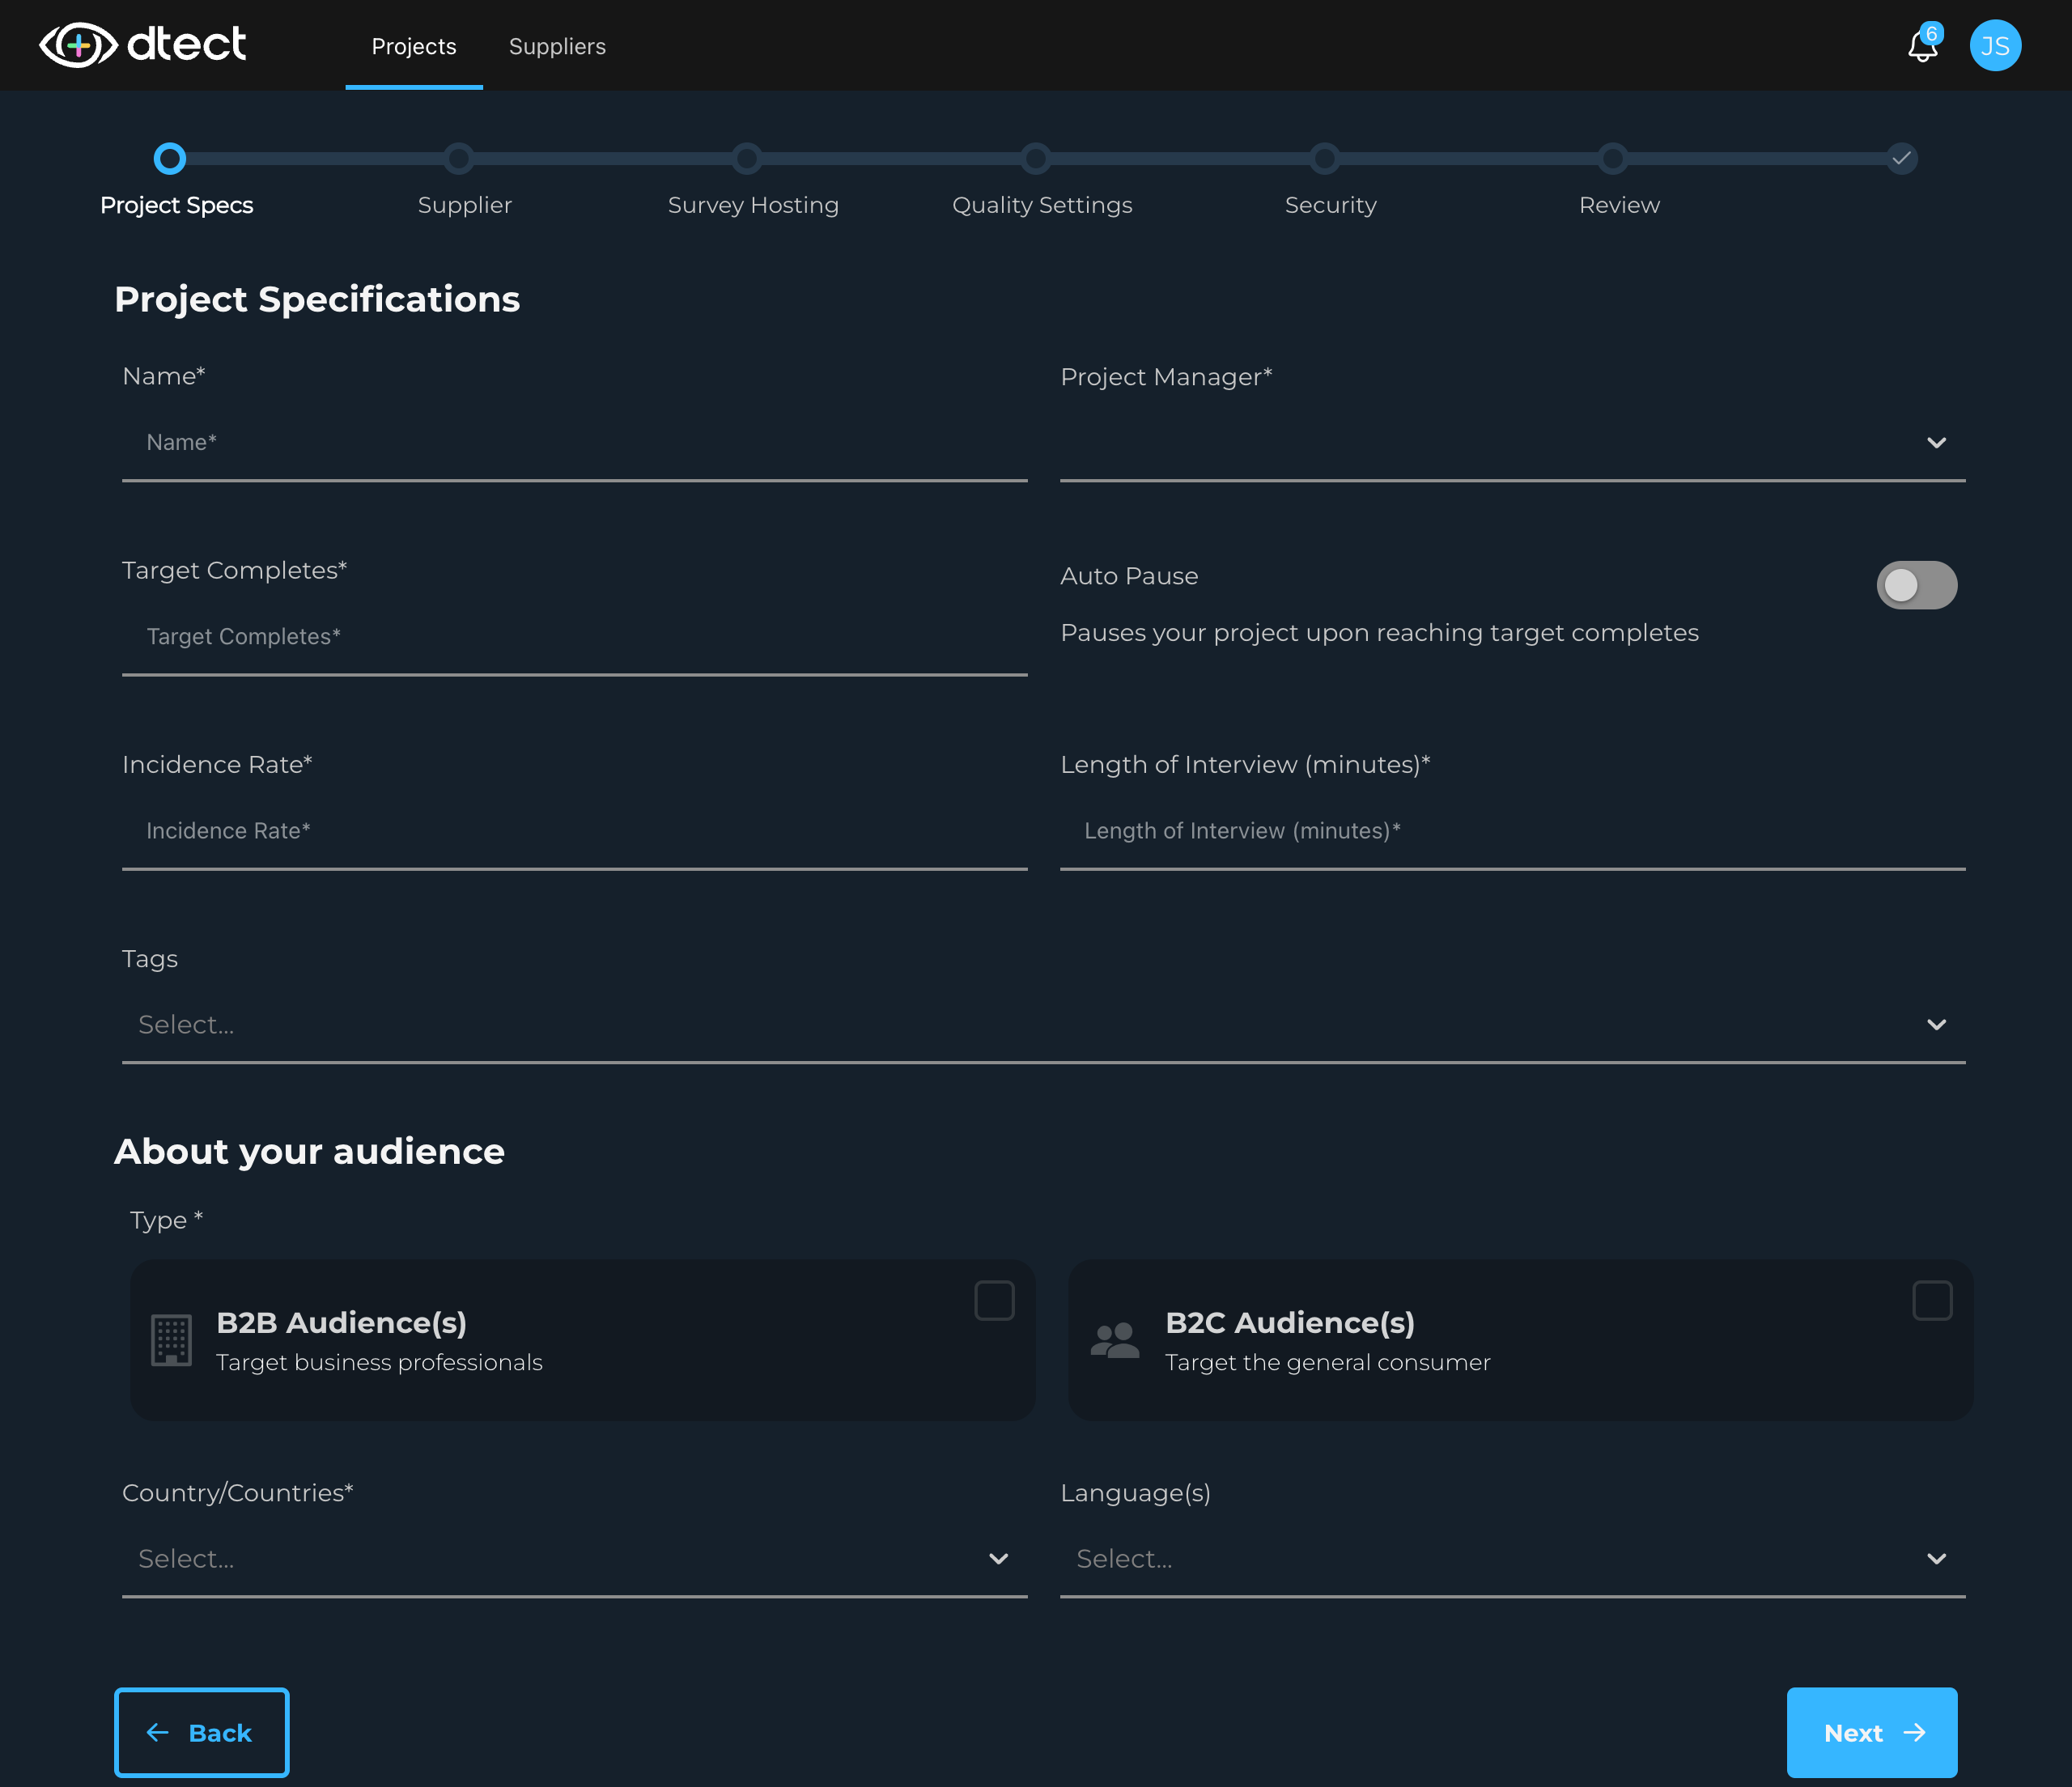
1. Name
This required internal project name is used to keep track of the project. Name it something unique to ensure it's easy to find later.
*You can search for this field in the Project Dashboard to find it later.
2. Project Manager
Project Manager is a required dropdown where you select the person managing the project. In most instances, users are assigning themselves as Project Manager.
*You can search and filter projects by Project Manager in the Project Dashboard.
3. Target Completes
Enter your desired number of completes for this projects. The only time this will affect respondents is when "Auto Pause" is enabled. In that case, respondents will be set to the Over quota status if they enter while the Auto Pause is on and the limit has been reached. Otherwise, this is for tracking purposes only.
Use case suggestion: Use the target completes along with the Auto Pause to manage your own survey soft launch. To do this, ensure the project is set up and ready for respondents then set the Target Completes to the soft send sample size and turn on the Auto Pause. This can also be used for daily or weekly limits.
4. Auto Pause
Enabling the Auto Pause will prevent additional respondents from entering the survey once the Target Completes has been reached.
If you are seeing over quota respondents in dtect but you're not sure why, be sure to check whether your quota limit has been reached with the Auto Pause enabled.
5. Incidence Rate
Enter the predicted Incidence Rate. If you're not sure, use your best estimate based on how challenging it is to find the target audience.
Incidence rate (IR) in market research is defined as the number of respondents from a sample pool that will qualify for your study. It is often synonymous with the qualification rate.
Our IR is calculated by dividing the total completes by (completes + terminates).
We are not including Security Terminates or Over Quota in our IR calculation.
6. Length of Interview (minutes)
The Length of Interview (in minutes) is a core metric of the project and is required but can be updated at a later time.
4. Tags
Tags are optionally used to organize projects. These are made up by you and are fully customizable. Type your tag into the box and click "Create tag" or select from the previously created tags.
*You can search and filter projects by Tag in the Project Dashboard.
7. Audience Type*
Select the type of audience for your project, either Business to Business (B2B) or Business to Customer (B2C). By selecting one, it instantly shows the Specialization dropdown.
This field is required.
Both B2B and B2C can be selected for the same project.
*You can search and filter projects by Type in the Project Dashboard.
8. B2B Specialization
Select from the available business to business specializations.
Banking/Financial
Bio-Tech Pharmaceutical
Corporate travel
Fulfillment
HR
IT Decision Maker
Legal
Marketing/Advertising
Office supplies | Operations
Real Estate (Brokers/Agents)
Sales
Security
Service
Software/Hardware
Technology
Transportation/Logistics
Other
9. B2C Specialization
Select from the available business to consumer specializations.
Automotive/Transportation
Community Insights
Entertainment
Finance/Legal/Insurance
Food/Beverage
Grooming/Cosmetics
Household
News/Print Media
Nutrition/Wellness/Fitness
Pets/Animal
Political
Political/Civic services
Print/Social Media
Realestate/Construction
Shopping/Ecommerce
Social Media
Sports/Gambling
Technology
Tobacco/Vaping
Travel
Video Games/Games/Toys
Other
Your selections here do not have an affect on participants in your project. These fields are used for filtering in the project dashboard later.
5. Country/Countries
Use the required Country/Countries dropdown to select the countries that will be represented in your survey. This only affects respondents when the "Locale lock" security setting is enabled, after which only the countries selected here will be allowed to enter the survey.
You can come back later and add additional countries after the project has been created.
*You can search and filter projects by Country Represented in the Project Dashboard.
6. Languages
Use this optional field to select the languages that will be used in the survey. Select all that apply. This does not affect the language shown to participants as this is determined by the participant's browser language. See Non-English Participant Experience to learn more.
*You can search and filter projects by Language in the Project Dashboard.
Once you've finished setting up your project, click "Next" to move on to the next page.

Visit Adding a Supplier to a Project to continue.