This article will guide you through the multi-step process of setting up redirects for a supplier in dtect.
Step 1: Obtain Supplier Redirects
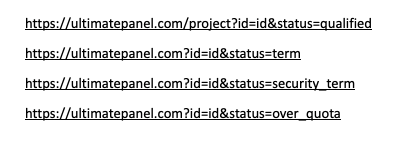
The supplier provides redirect links, which are necessary for initiating the setup process.
Here is an example set of redirect links for a fictitious supplier called "Ultimate Panel".
Key information to pay attention to includes:
- How the supplier adds the respondent's unique ID to each redirect. Typically, the redirects contain a variable label indicative of the unique identifier, followed by "=" and a placeholder for the ID. e.g. gid={gid} or pid=[PID]
- Whether there are any Project-Specific variables in the supplier's redirects. These variables are specific to one project and may include a project identifier or project-specific status identifiers.
The supplier can assist you with any clarification needed regarding specific variables within their redirects.
Step 2: Setting Redirect Links
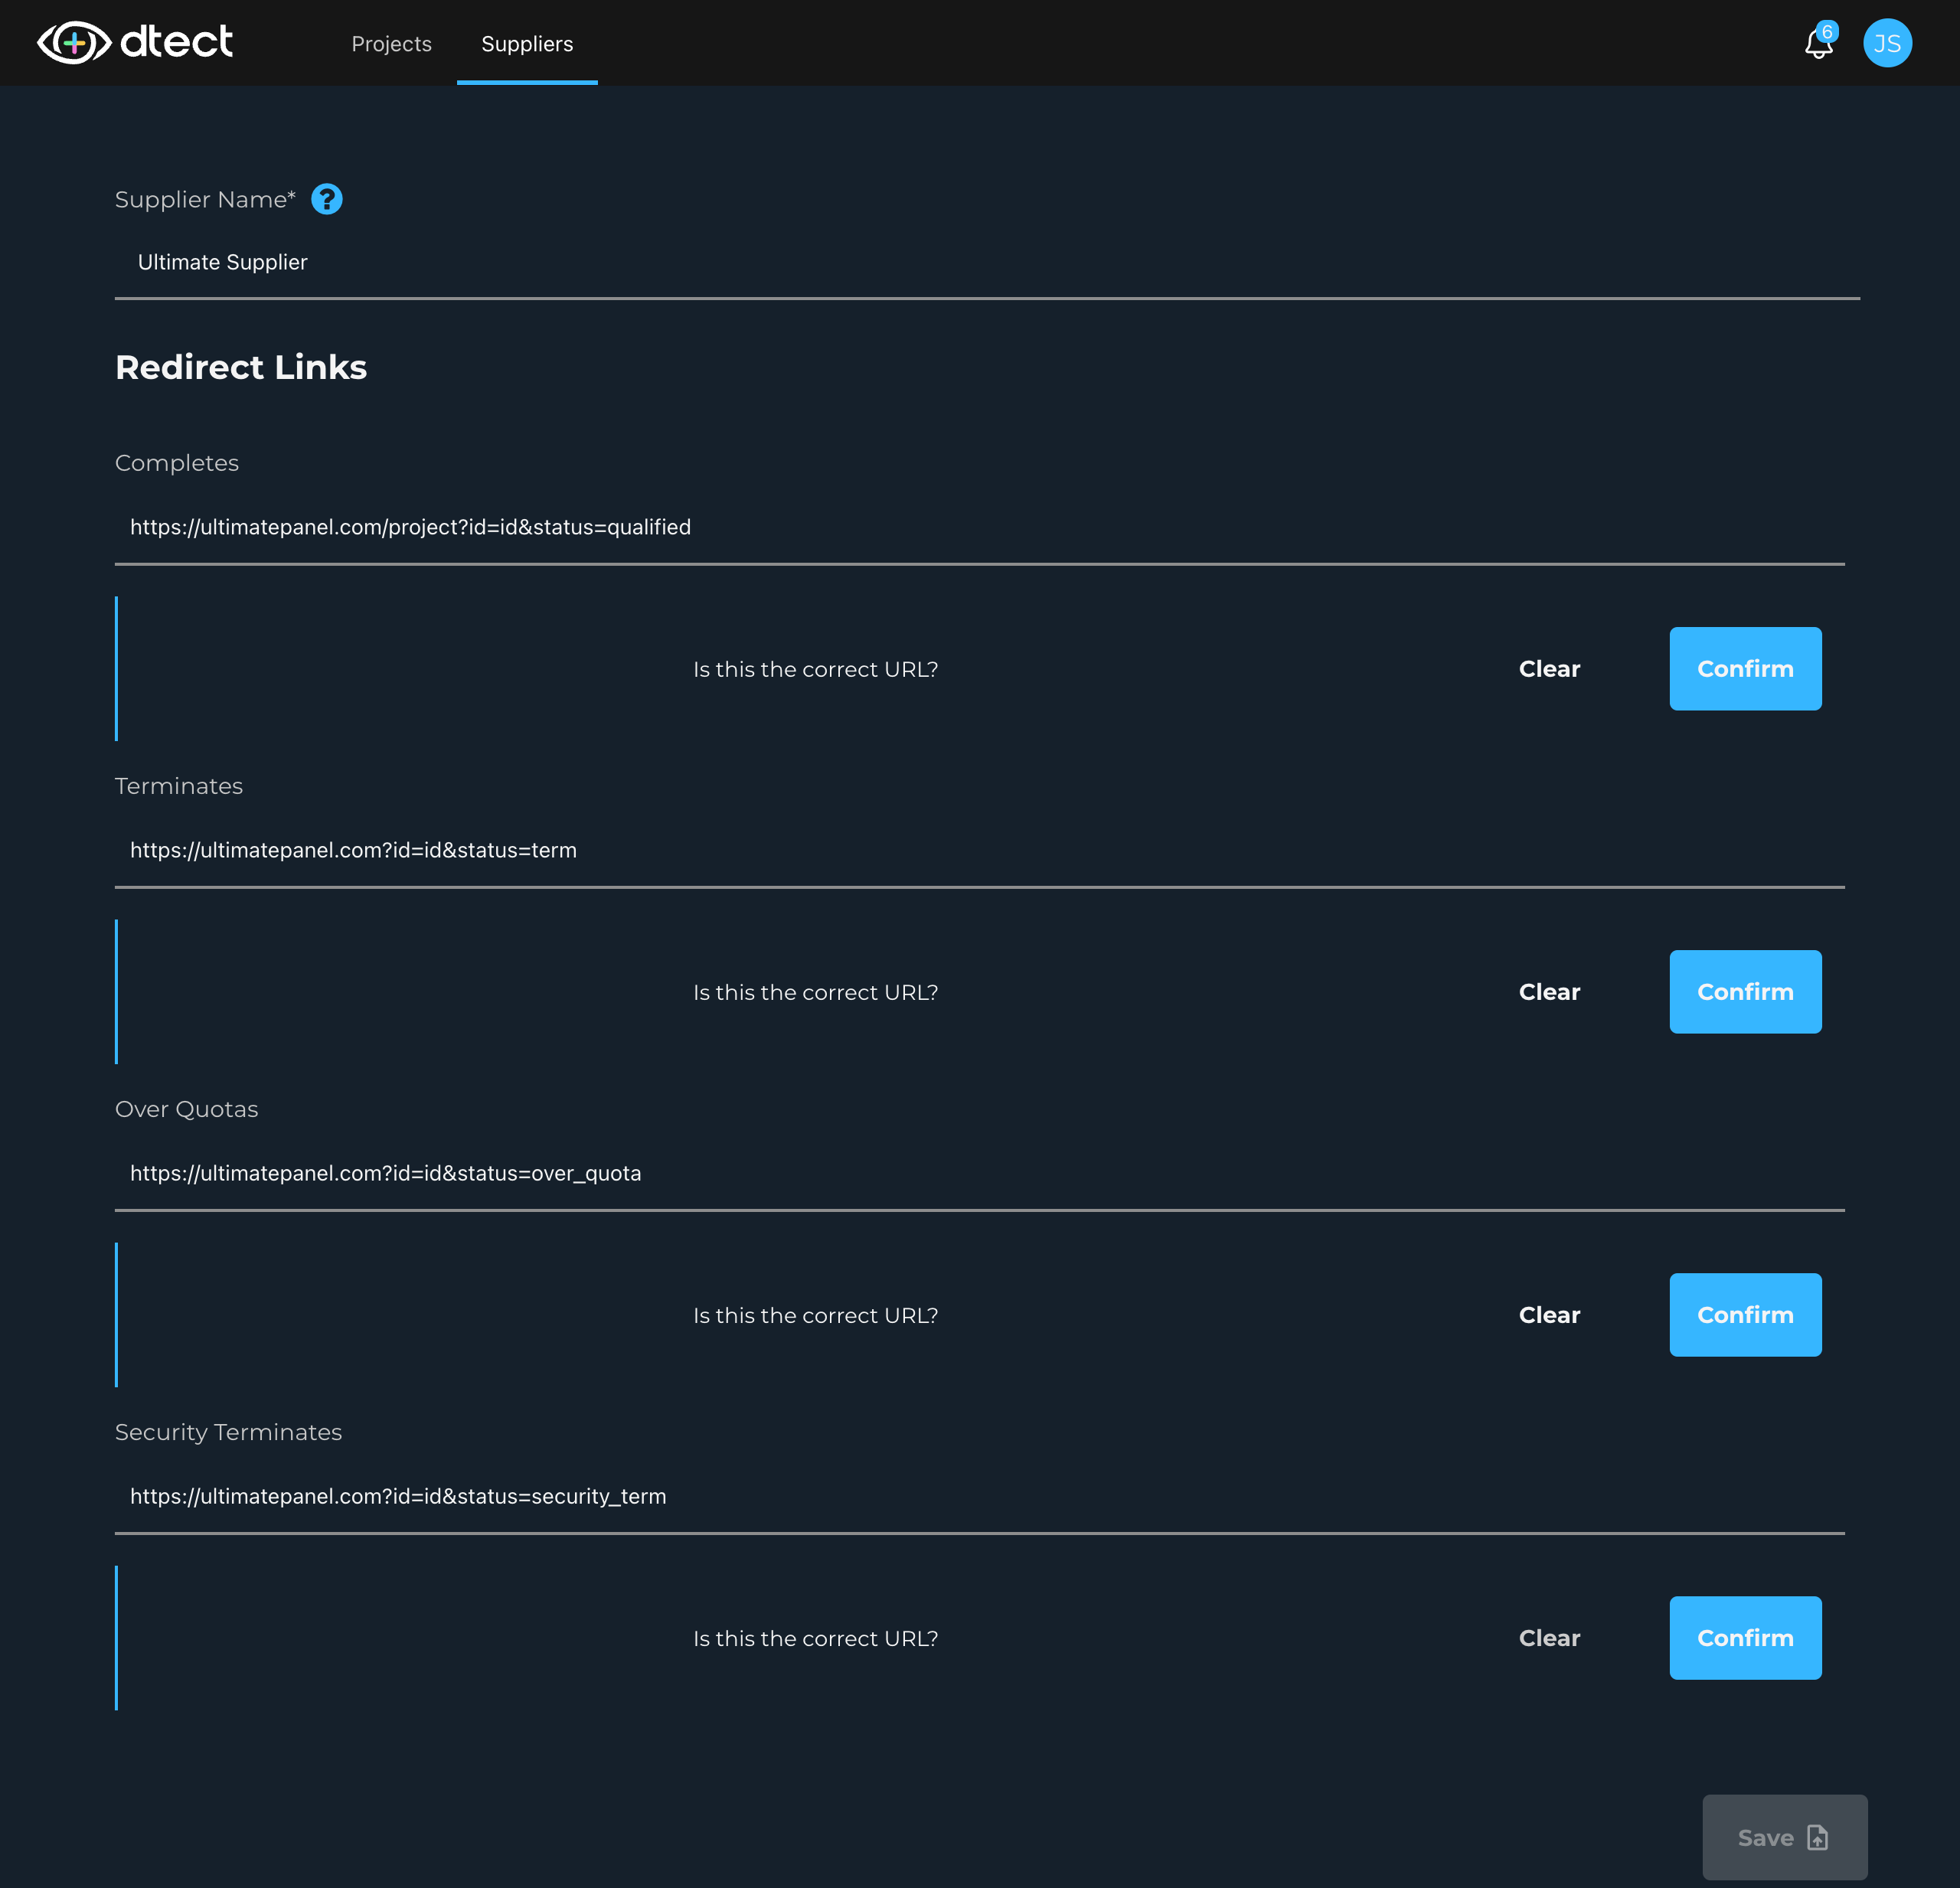
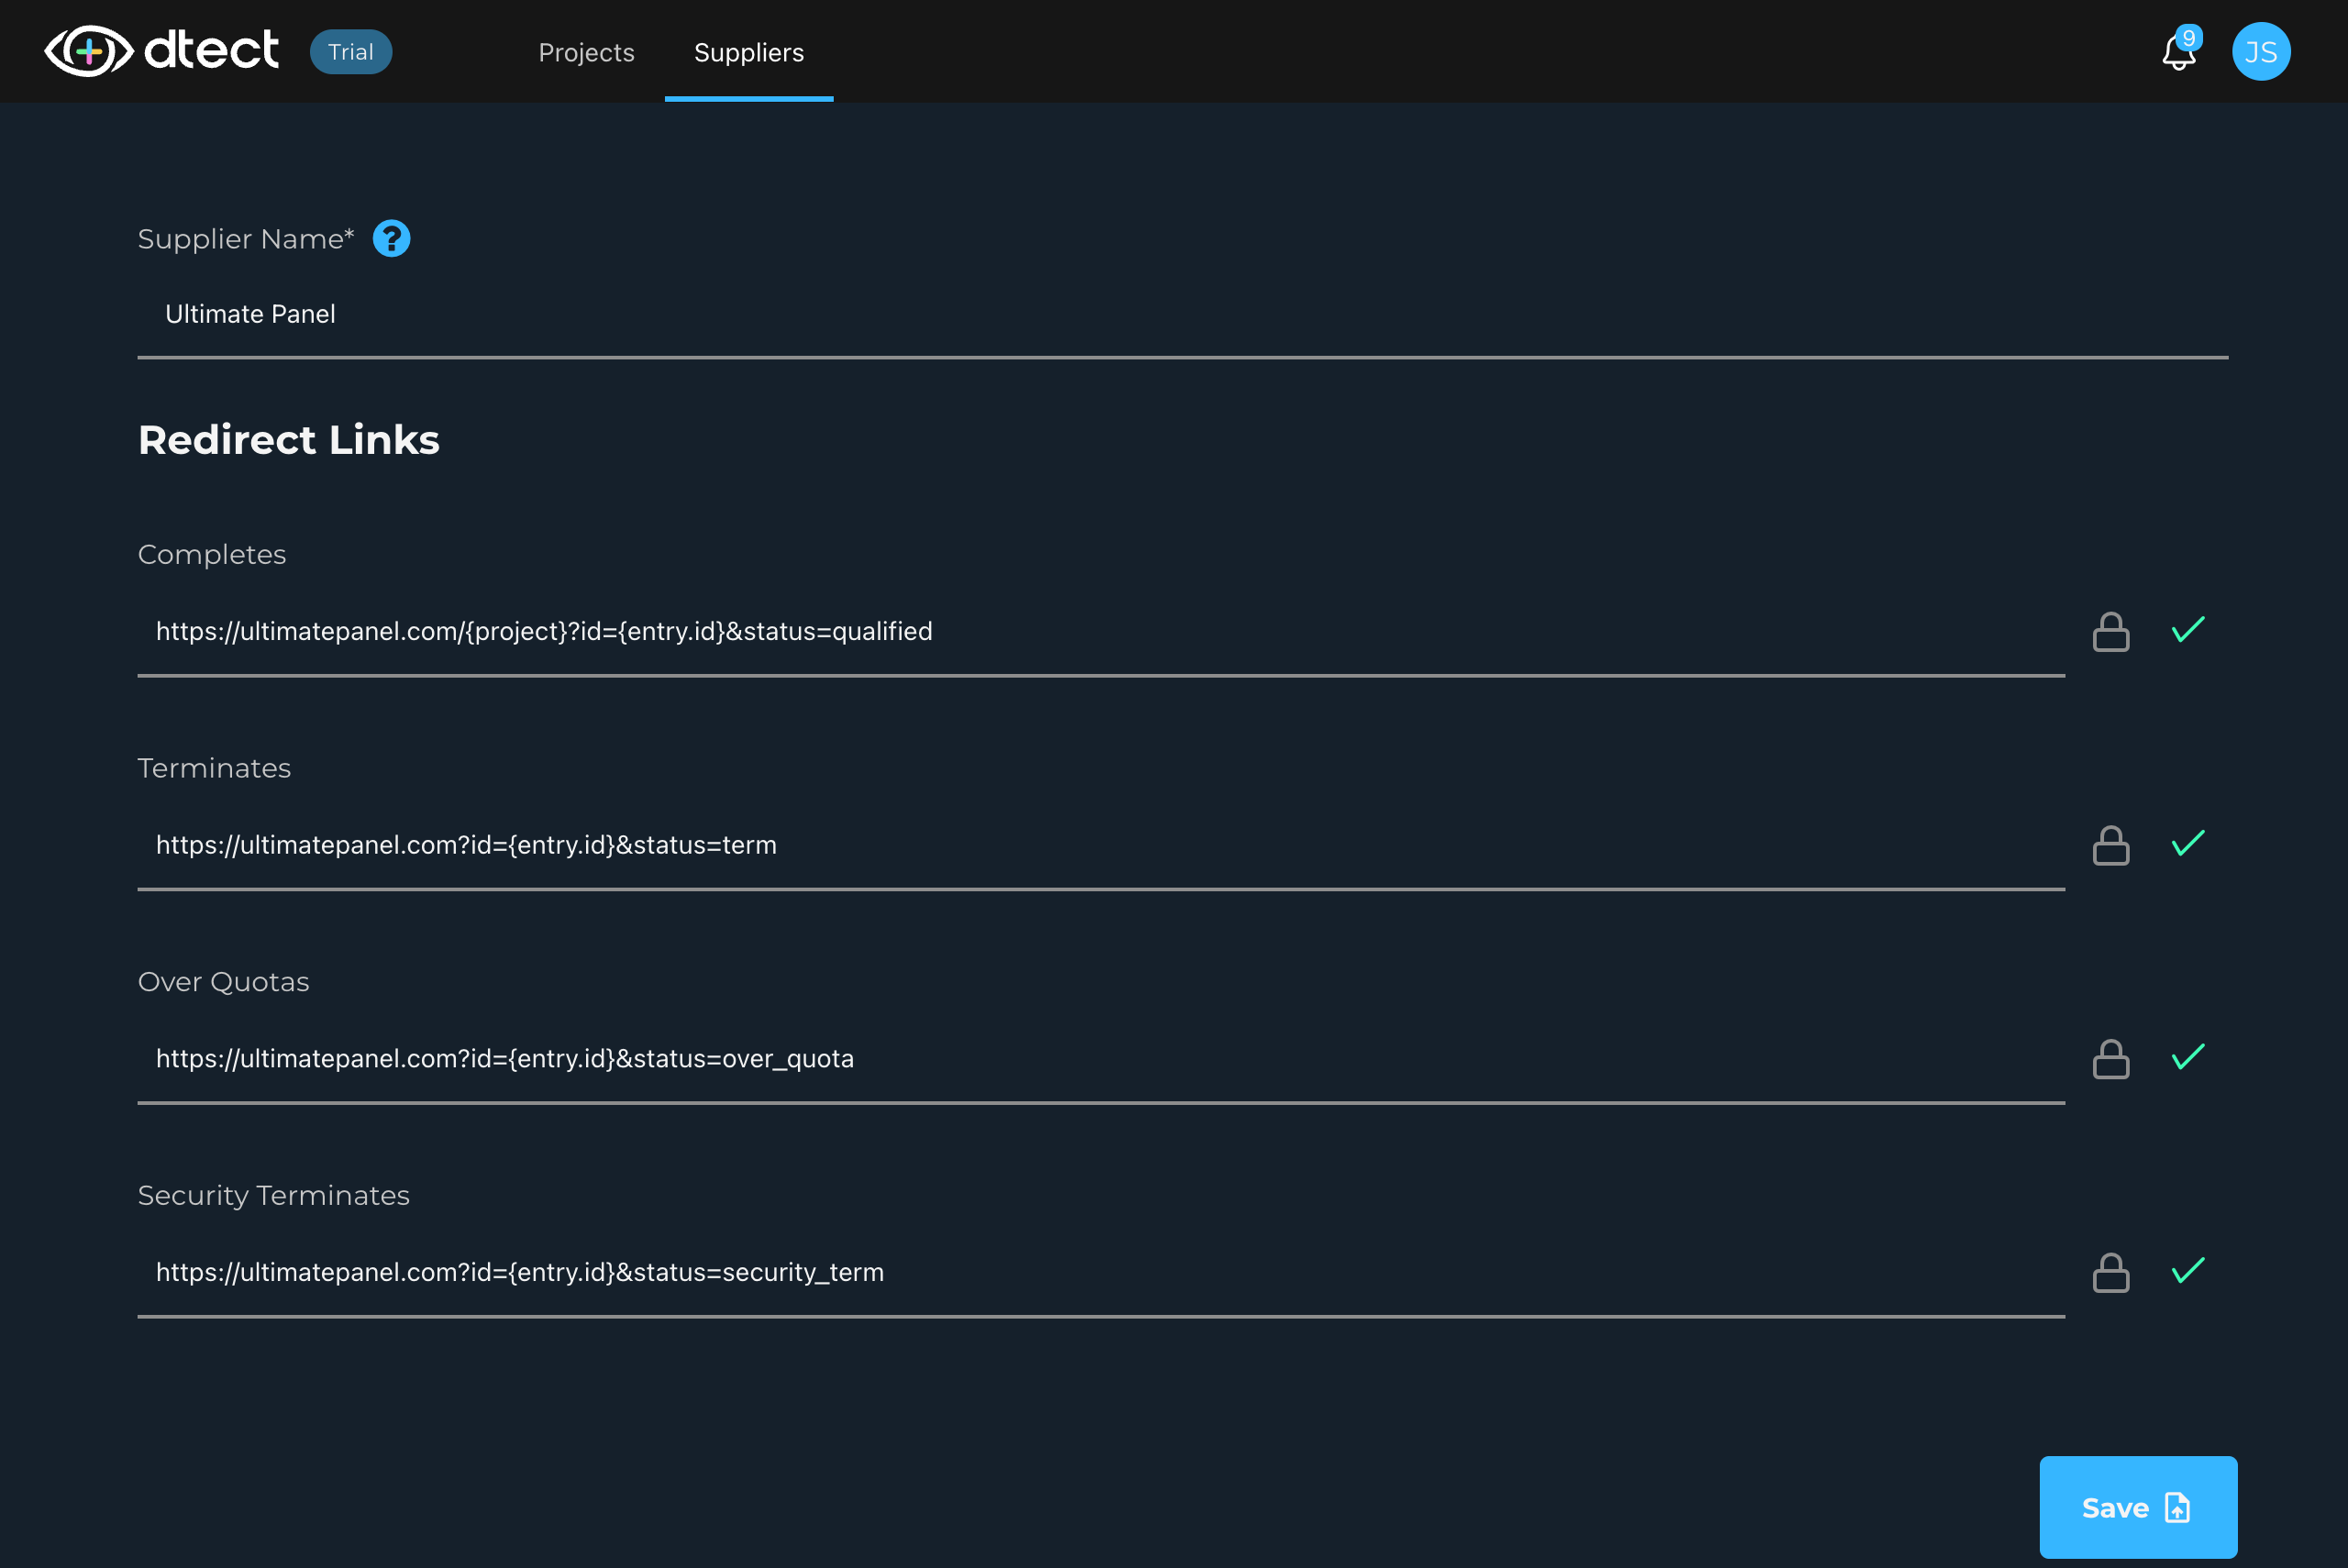
Each supplier's redirect link should be copied and pasted into the appropriate status field (Completes, Terminates, Over Quotas, and Security Terminates). Note that at least one redirect link must be entered before proceeding to the next step.
Here is the "Ultimate Panel" redirects entered into the appropriate input box:
Step 3: Edit/Confirm Redirect Links
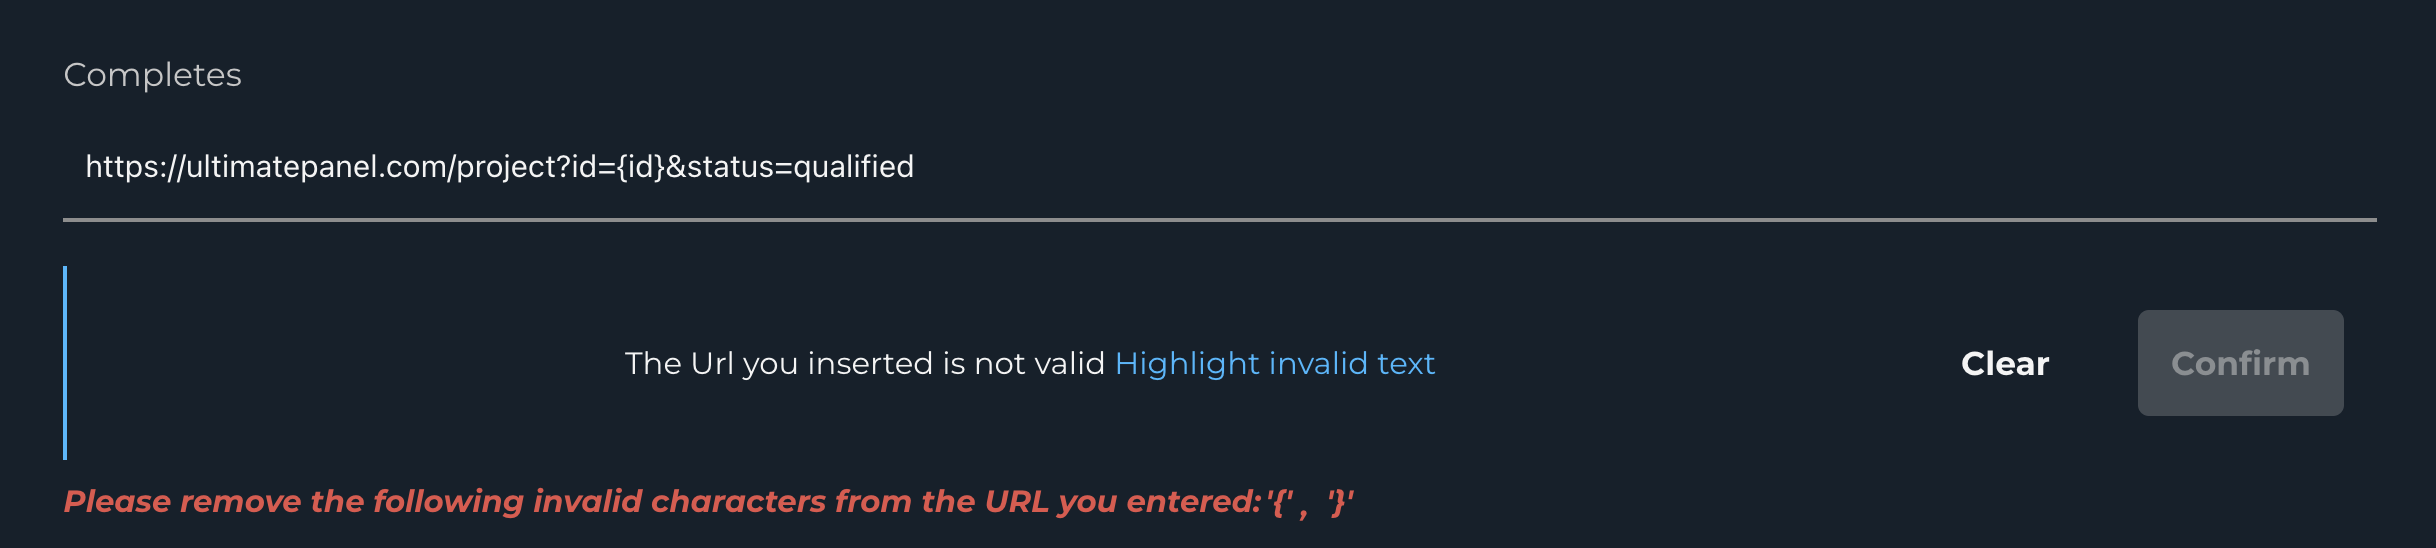
Before confirming the redirect link, it can be edited if needed. Be sure there is a variable for a unique identifier otherwise you will be required to start over. Any field containing square brackets [ ] or curly brackets { } is considered invalid. "Highlight the invalid text" and delete any invalid brackets to proceed. Use the "clear" option to remove the pasted redirect link and start over for a specific status if necessary.
Here's an example of what it would look like if there were invalid characters:
Step 4: Append Panelist ID
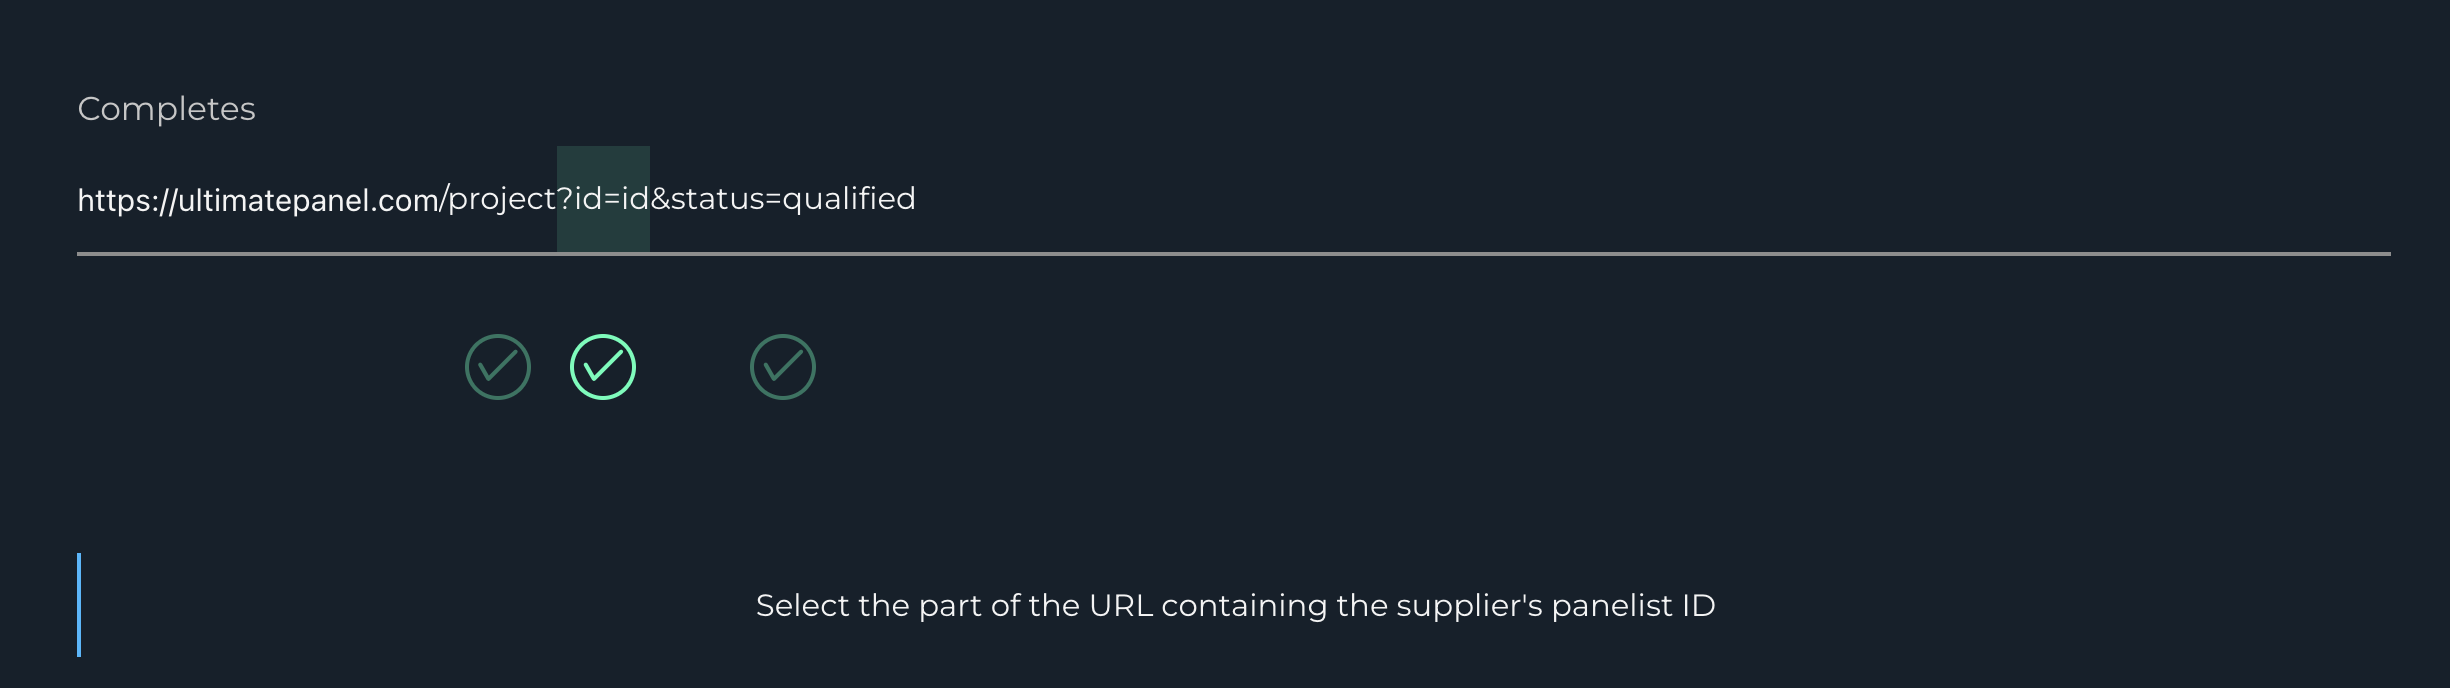
The Panelist ID is the unique identifier that the supplier appends to the dtect entry redirect so that the supplier can track the status of that panelist.
Select the location in the redirect link where the panelist ID should be appended. Instructions should be provided by the supplier, usually in the form of a placeholder in the redirect link. Once the Panelist ID variable is selected, the syntax {entry.id} will be added to ensure the panelist ID is appended in that part of the redirect link.
Here's the example of Ultimate Panel redirects being implemented and dtect asking which variable is the panelist ID.
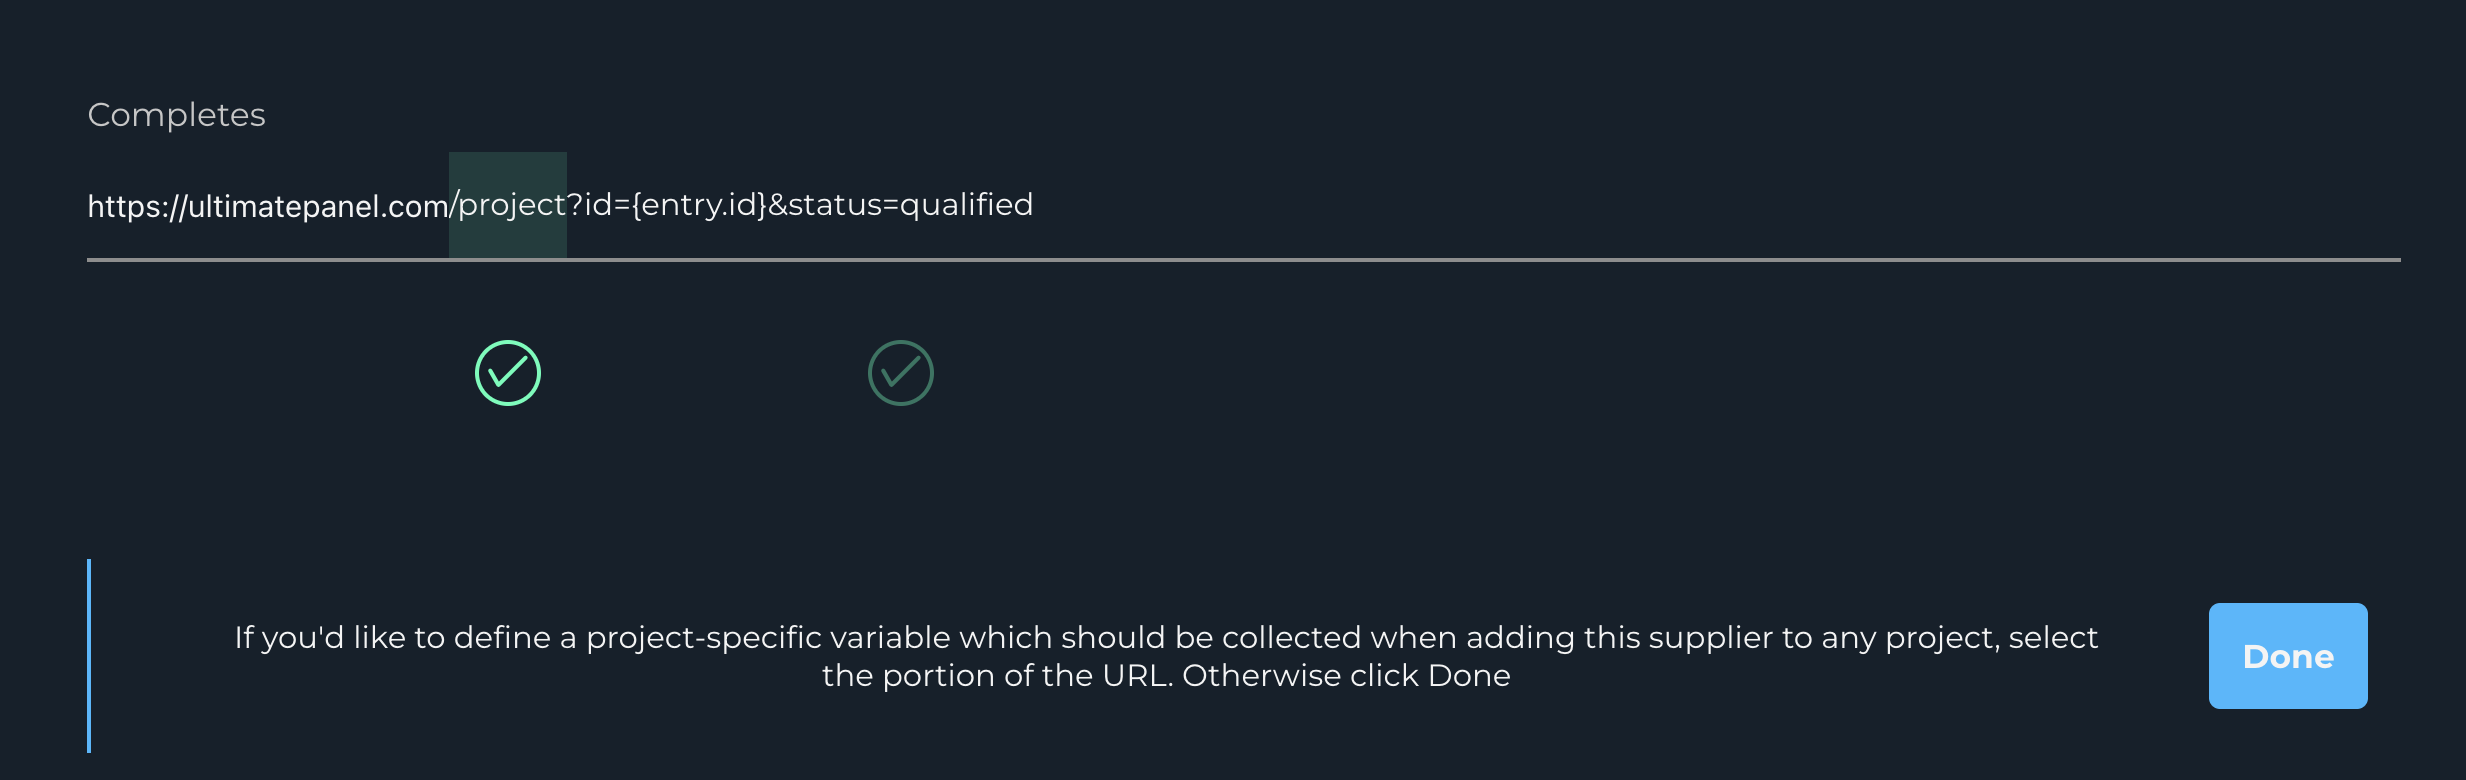
Step 5: Project-Specific Variables
Check if the supplier includes additional variables (not panelist ID) in their redirect links that change with each project. An appropriately named placeholder within {} will be added to the redirect links. If the supplier doesn't have project-specific variables in their redirect links, select "Done" to finish that redirect link.
Path variables are part of the redirect link's path and are not typical variables passed after the query string separator ( ? ) in a redirect link. Provide a name for each path variable encountered. Later, when adding the supplier to a specific project, enter the actual variable value for each named path variable.
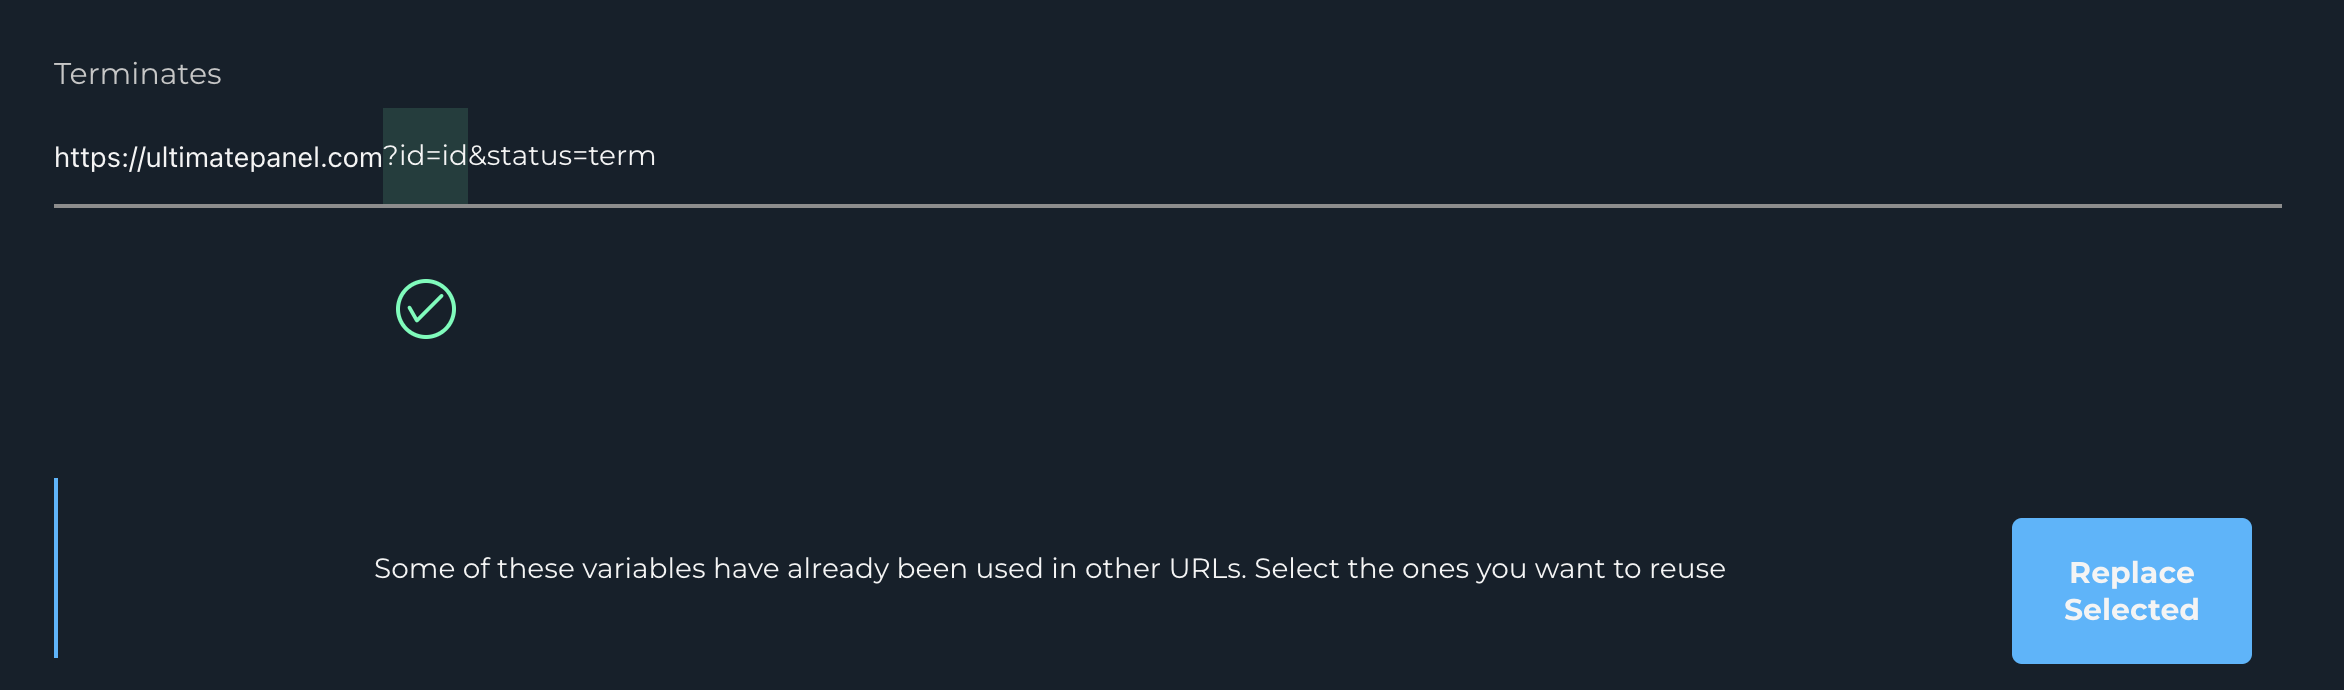
Step 7: Next Steps
After setting up the first redirect link, subsequent redirect link setups will automatically look for the same variables (panelist ID and project-specific variables). The sections requiring placeholders for these variables will already be highlighted (checkmark selected). Select "Replace Selected" to set up variables for each new redirect link if the variables are named differently.
Step 8: Proactive Variable Selection
Repeat the process for each redirect link until "Done" is selected on all four. Each redirect link should display a lock icon and blue checkmark. Verify that all four redirect links appear complete and accurate. Select "Save" to finalize the setup.
Following this process ensures accurate setup of redirects using the supplier's information, the correct appending of variables, and customization of the redirects for different projects.